
Follow us


I recently posted a picture on Instagram of a sled I built for my electric planer to allow me to flatten slabs of wood which are too wide for my thicknesser. A lot of people use a router sled for this purpose and I've got one of those too but I prefer the planer sled.
I didn't come up with the design or idea. I was looking for inspiration and found a video by Talel Belkhodja on YouTube here. I really liked the idea but there were no plans or even detailed views of the sled. I decided to make a prototype to see if I could work out the details. I'm still using that prototype and thought I'd share some of the details.
My version is made mainly from MDF which I had as scraps. You really need something a bit more stable. I'm sure I'll remake this at some point and will probably use plywood.
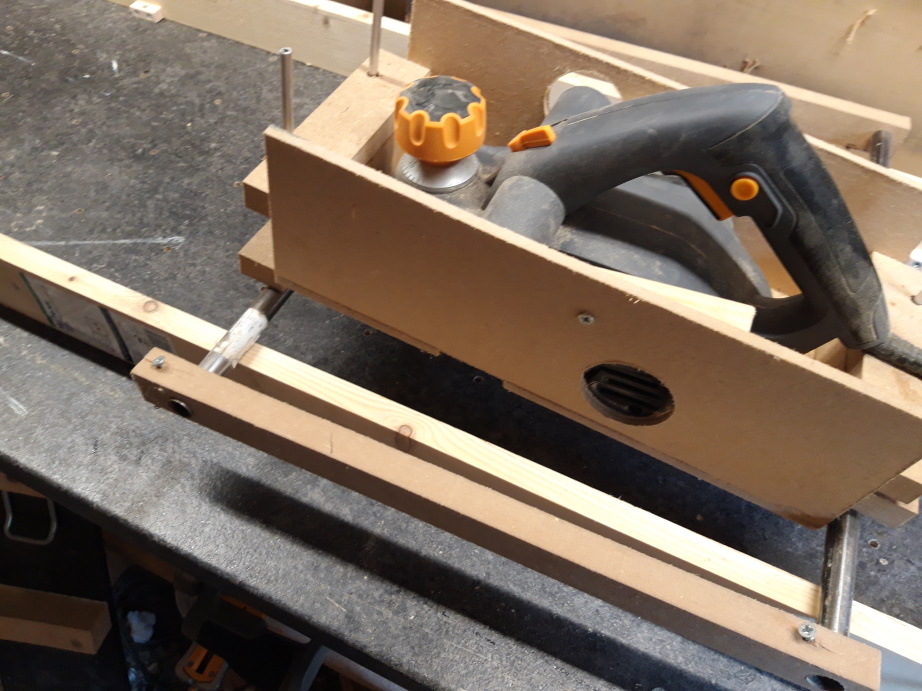
This is a photo of the sled in action, flattening a piece of Ash to make a console table.
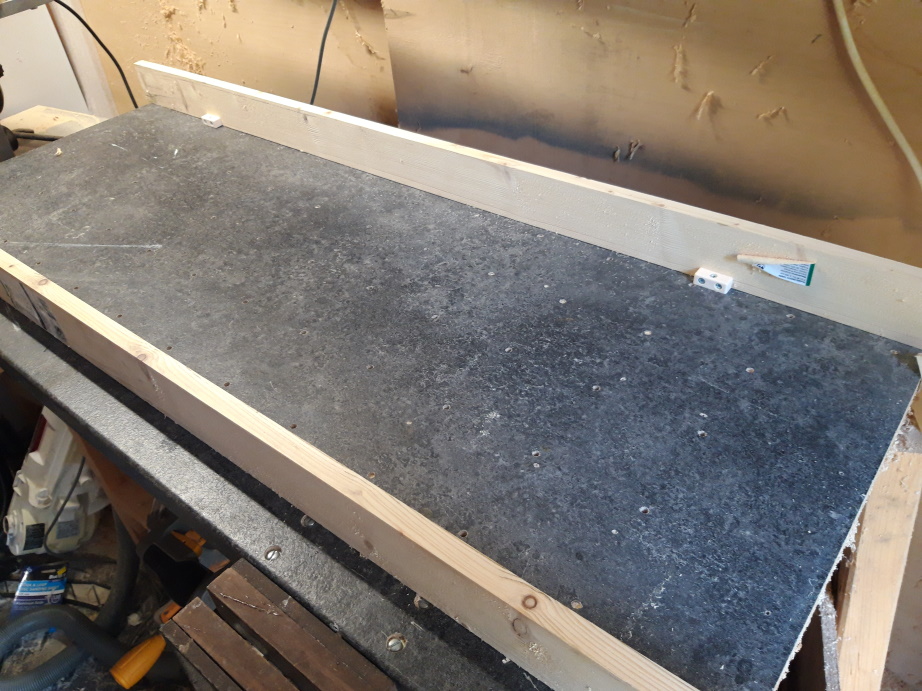
So, the first thing you need are the rails. They can be any length but they need to be straight and flat. The height of the rails from the work surface is important. Too high and your planer won't touch the workpiece (although you can prop up the workpiece). The distance between the rails is dictated by the workpiece and, more importantly in my case, the size of my workbench.
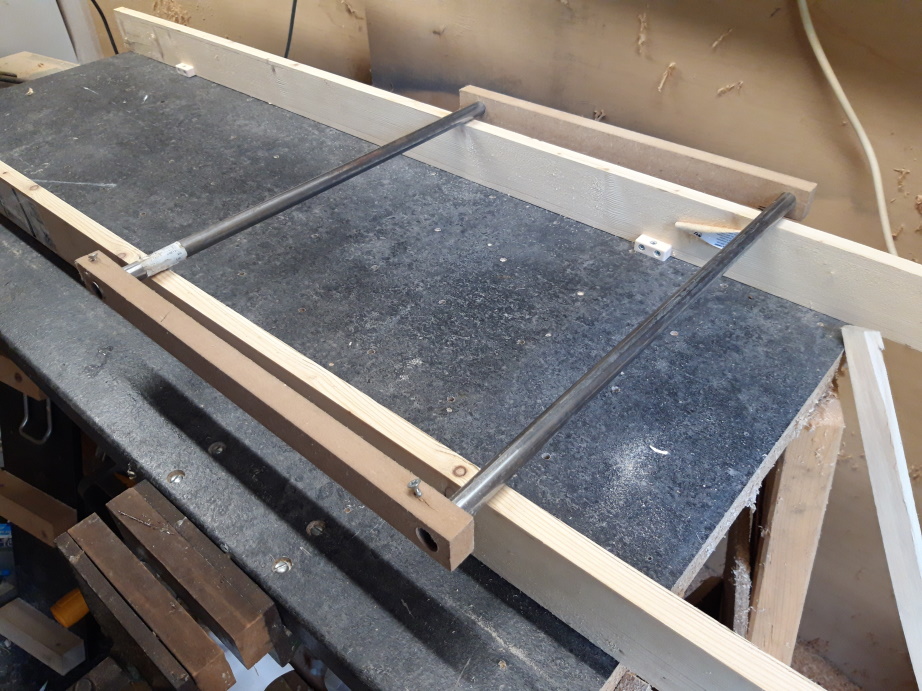
The next component is the sled carriage. I've used some 10mm metal pipe but anything with won't bend under the weight of the planer and will slide along the rails will work. The width is determined by the spacing of the rails. It's best to have the end blocks which hold the pipes close to the rails to avoid too much movement. You slide the carriage along the rails and the planer along the carriage to cover the whole workpiece. One piece of advice: add stop blocks at the end of the rails to avoid you pushing / pulling too far and coming off the end of the rails!
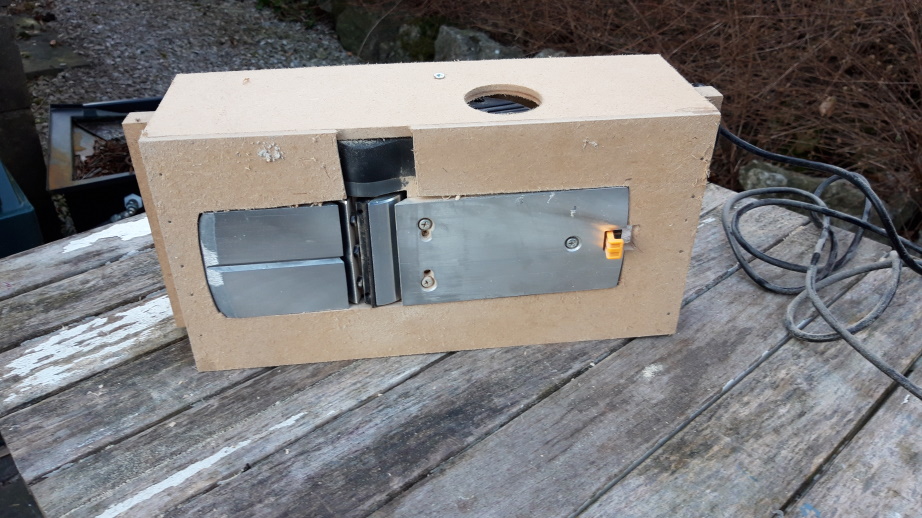
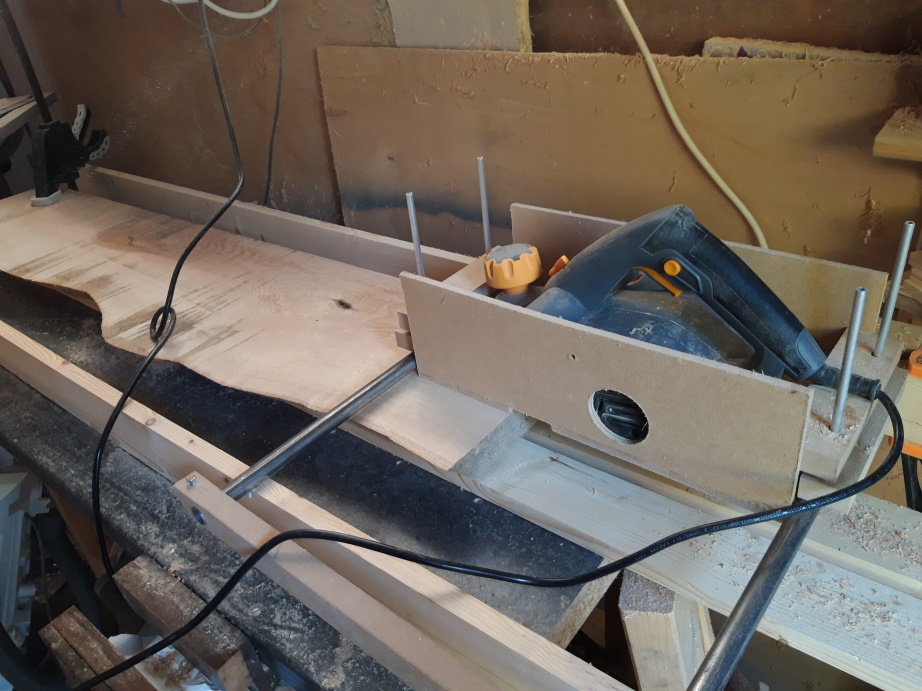
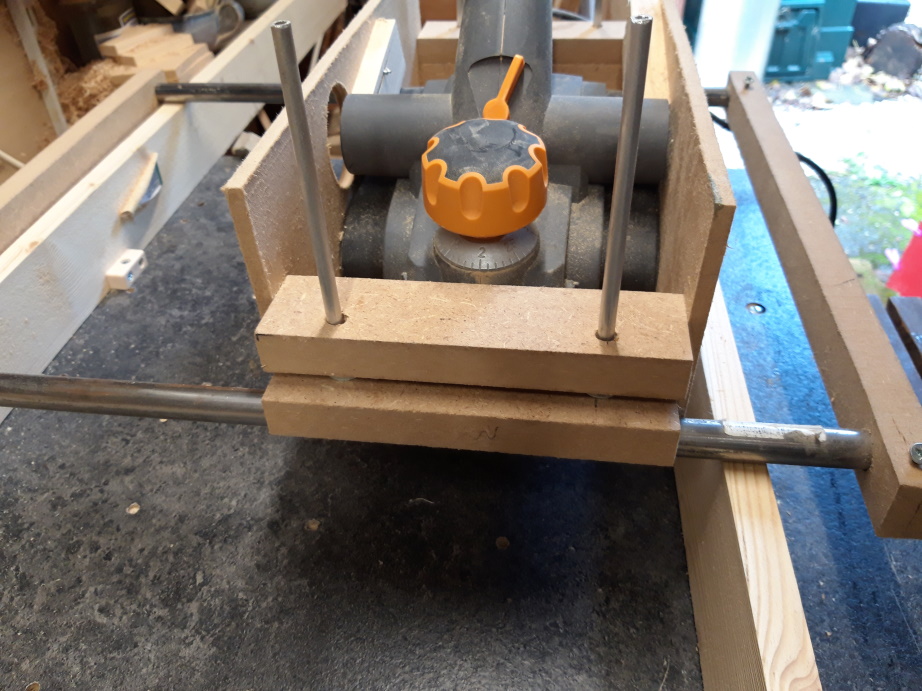
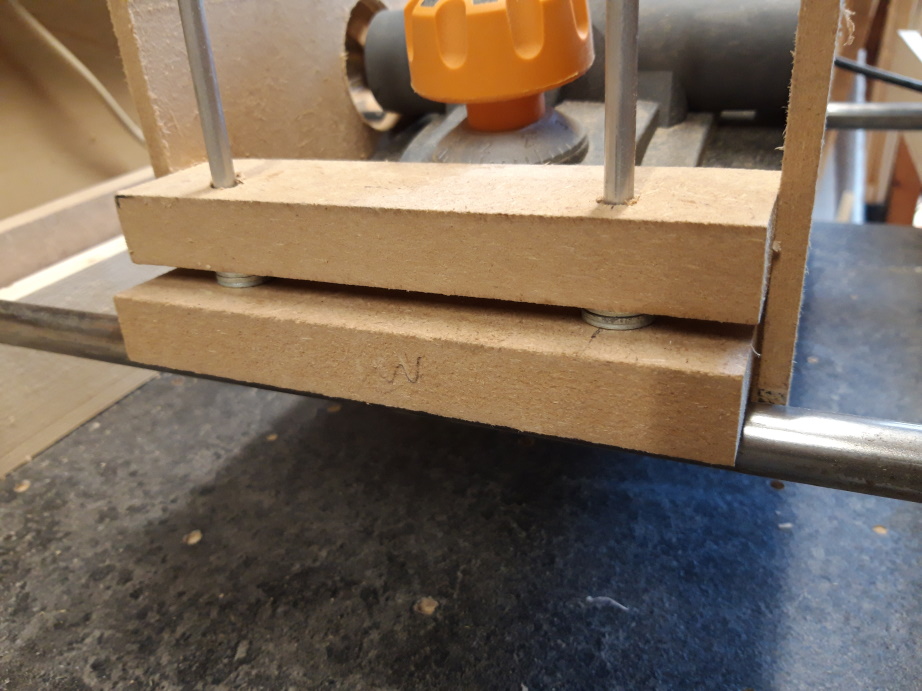
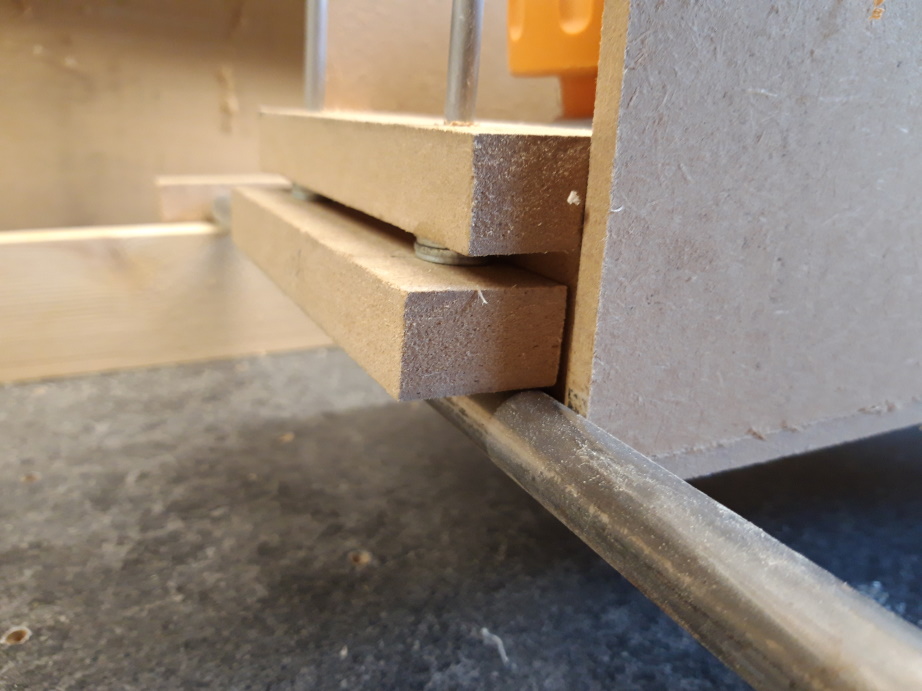
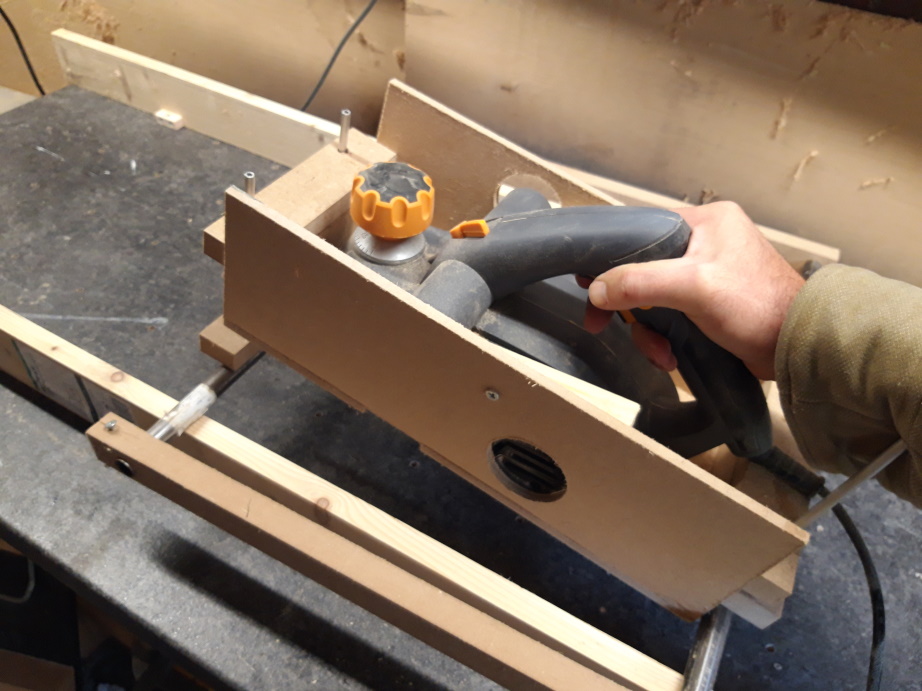
Next is the box which holds the planer. The planer is fixed into this with some wooden blocks. Holes have been cut for the air vents and dust ports. The bottom has been cut out for the bed and the blades of the planer. Note that there are lips at the front and back of the box with holes drilled in them. This allows some blocks to be fitted which adjust the height of the planer box from the carriage using washers.
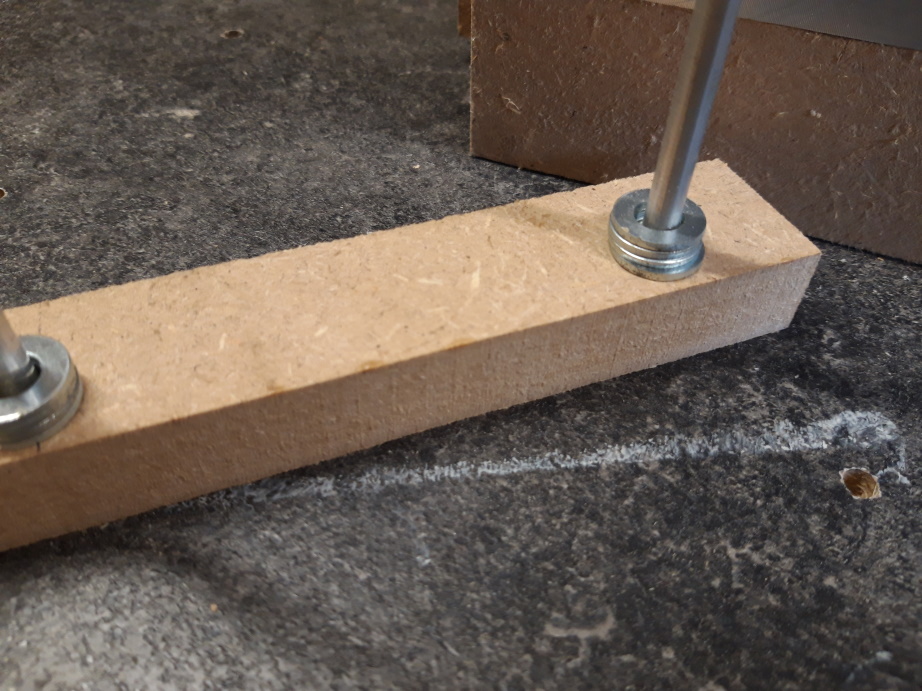
This item is the spacer (one for the front and one for the back). The metal pipe of the carriage sits under the block. The numbers of washers you add determines how high the planer is from the carriage and therefore the workpiece. Once you have planed enough that no more material is being removed, you take one washer from each post to lower the height and start again until the piece is flat.
With all the components together, you have a planer sled.
One final thing to mention: don't forget that, after you do a forward pass to remove material, you need to lift the planer as you pull everything back for another pass.
I hope that helps someone if they are interested in making a sled for their planer. I definitely find it more useful than a router sled and I'm surprised I don't see these around very often. There is certainly scope for improvement but it's a good concept.
If you'd like to comment on this article or suggest any changes, please use the form below.